
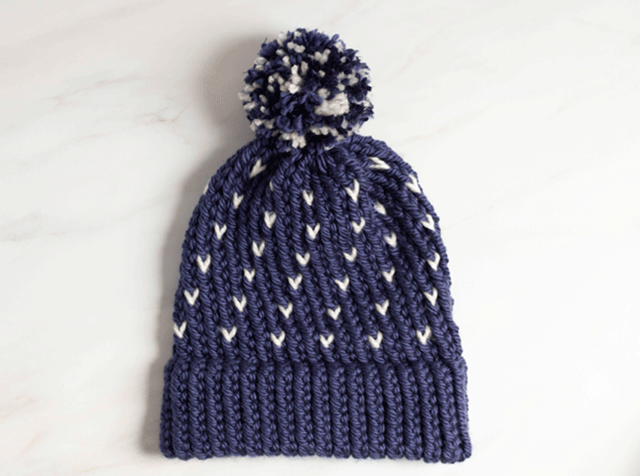
Learn to Loom Knit a Tiny Hearts Beanie
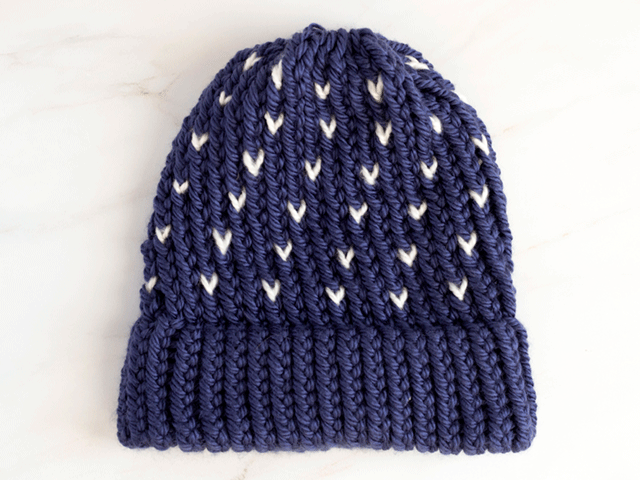
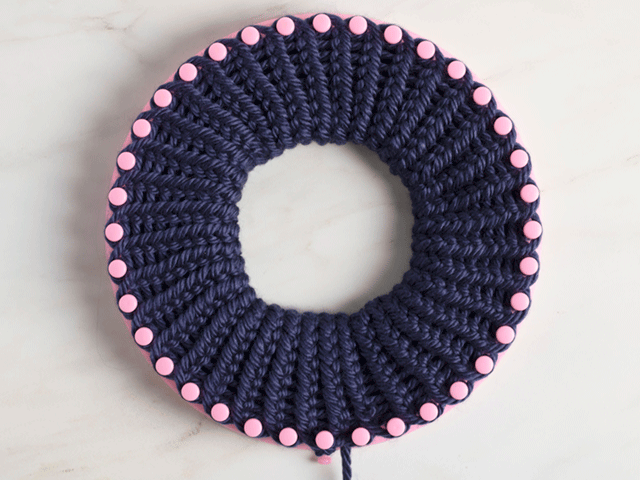
Okay, so you want to make a multi-colored hat and you don’t know where to start? This tiny hearts beanie is a great option for beginners looking for a quick, easy project. It uses the basic e-wrap stitch, which naturally looks a bit like a heart when you look at it closely. The double-brim on this hat prevents curling, and the soft, chunky yarn ensures a snug, warm fit.
With some practice and familiarity with loom knitting, you can knit this hat in a little over an hour. Of course, you can take as long as you need to finish this hat – no pressure or rush from me!
A Quick Guide to Materials
For this tiny hearts beanie, I used my pink loom that came as part of a round loom set from Amazon. This particular loom is 9 inches in diameter and has 36 pegs, making a hat that’s perfect for the average female adult head. If you want to make a different sized hat than that, don’t worry – this pattern is flexible and versatile. You can use the same concepts in my tutorial on a smaller or larger loom without too much fuss.
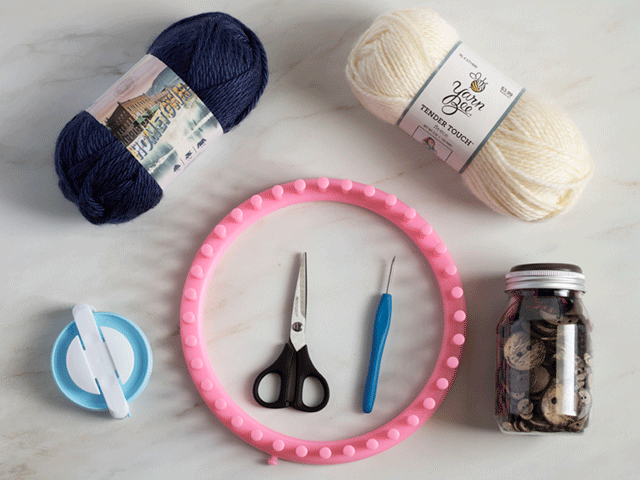
This loom has a bigger gauge than most, so it needs a thicker, chunkier yarn. If you want to make a tiny hearts beanie exactly like the one featured, use two different colored skeins of Lion Brand Hometown yarn, size 6 bulky yarn. If you use a thinner yarn, you may need to double-up to ensure the hat isn’t too loose and airy.
In addition to your loom and your yarn, please have a loom hook, scissors, and yarn needle on hand. The pompom is optional, but if you want one you can purchase a separate pompom or make your own with a pompom maker. Buttons and tags make for a fun flourish, but that’s entirely up to you to add at the end.
How to Cast On with the E-Wrap
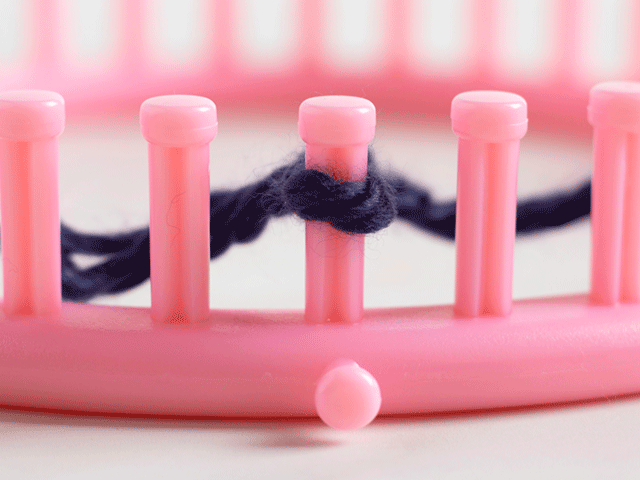
My pink loom has a convenient marker to let me know which peg should be my starting peg. If your loom doesn’t have a starting peg, don’t worry, you can mark your loom with a marker or some tape. Or you can purchase some peg markers to help you keep track.
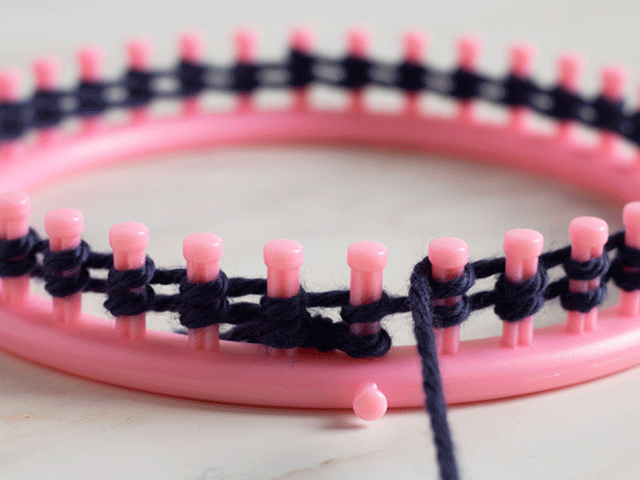
When you’re ready to begin your tiny hearts beanie, tie a slip knot around your first peg. Don’t worry about having a small yarn tail – you can always tuck this in when you’re done.
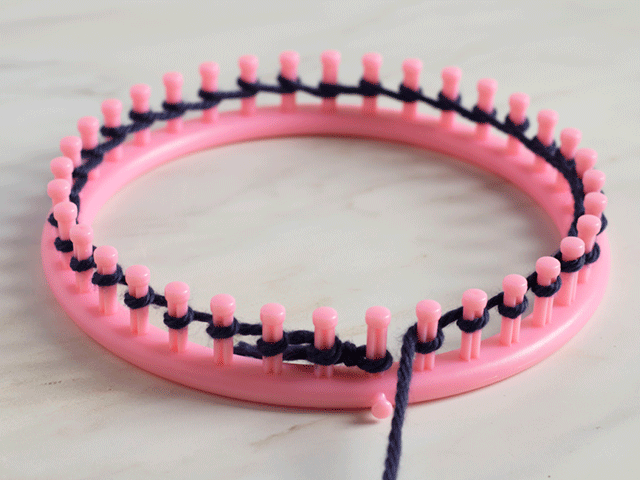
Wrap your yarn around the adjacent peg. This basic wrapping technique is called the e-wrap stitch because it takes on the shape of a lowercase e.
You can choose whether you go to the left or the right. Just remember that whichever direction you go, you’ll need to keep it consistent for this particular hat. When I took photos for this project, I went to my left, so that’s what you’ll see.
Continue to wrap your yarn around each peg until you’ve made your way around the entire loom. As you wrap, pay attention to your yarn tension. Your yarn should stay tight enough that it doesn’t fall off the peg, but loose enough that you can slide it over the peg in just a minute.
Easy peasy. You got this.
Go ahead and repeat your e-wrap around your entire loom a second time, so you have two rows of wraps on each peg. When you’ve done the last peg, pull your working yarn loosely around your marking peg to hold it in place (or just hold it for a bit).
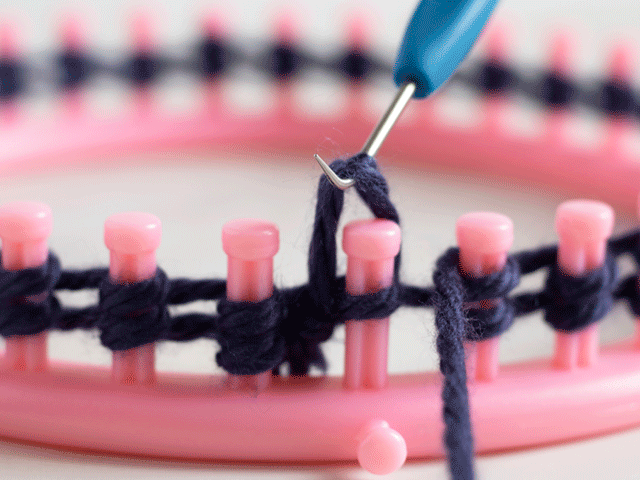
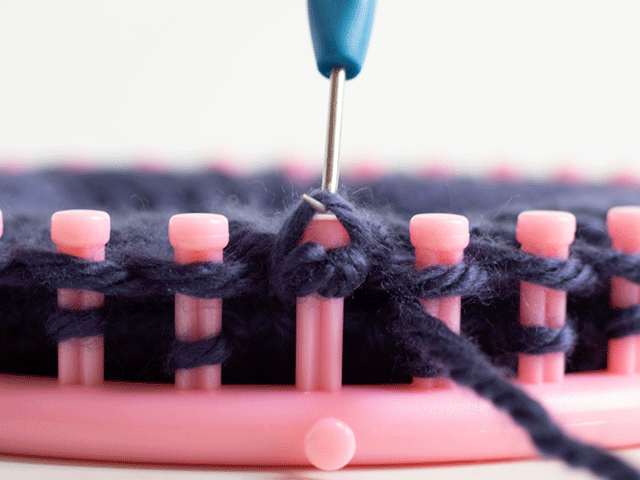
Grab your loom knitting hook or pick, slide it into the bottom loop on your first peg. Pull gently – you don’t want to undo your initial slip knot.
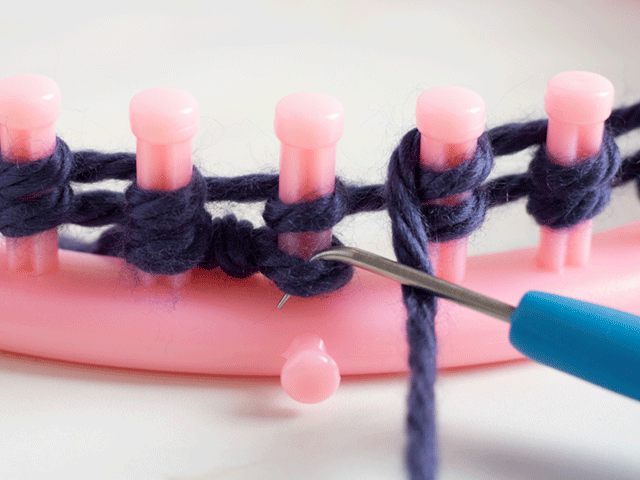
Lift the bottom loop over the top of the peg, letting it fall behind the peg. Then move onto the next loop and repeat. Slide, lift, and fall. Work your way around the entirety of the loom.
Well done! You’ve just completed the first row of your tiny hearts beanie.
From here, you unwind your working yarn from the marking peg. Then you e-wrap around your loom again. And like before, you grab your hook, lift the bottom loop over the top loop on each peg. If you find your loops sliding closer and closer to the top, feel free to push them down from time to time as needed.
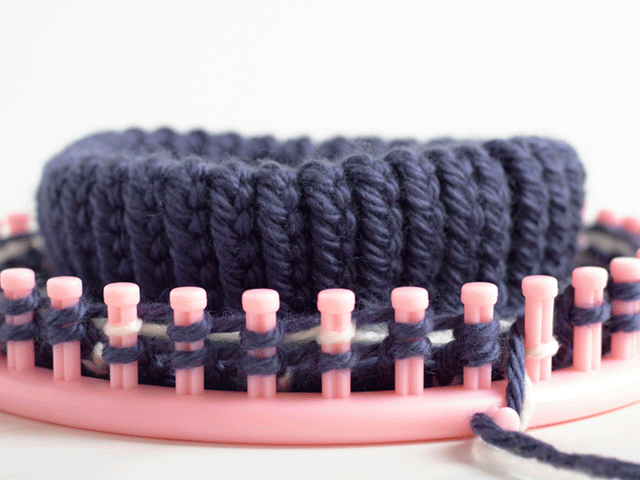
How to Knit the Double Brim
A lot of loom knitting involves counting rows. To make the brim of your tiny hearts beanie, you’ll need approximately 15 to 20 rows of the e-wrap stitch. I personally prefer a thicker brim for a snug fit, so I tend to knit at least 18 rows. However, you can make a thinner brim with fewer rows if that’s your preference. If you’re guessing a size, remember that you will be folding the brim over the top of itself. So whatever you see will be halved.
When you’ve knitted enough rows, reach inside your loom and grab the bottom edge of your hat. Take a close look at the end row – it has lots of little loops. Those loops will need to go up on top of your current row of loops.
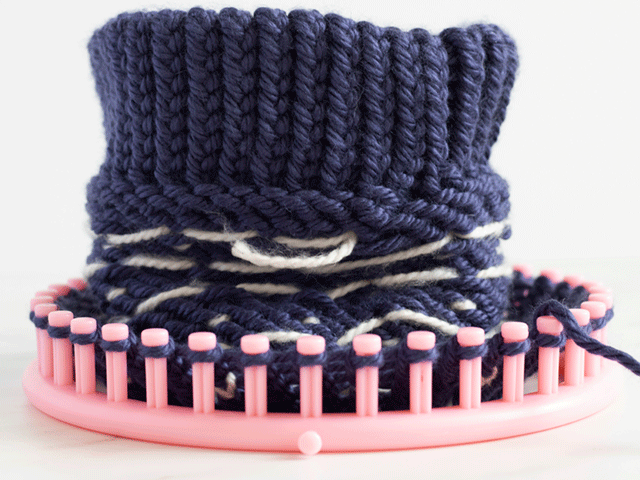
To ensure your brim stays straight, trace a finger from your starting peg down to your beginning slip knot. Grab the loop to the left of your slip knot and pull it onto your marked peg. Then grab the next loop and pull it onto the adjacent peg, working your way around the entire rim until every peg has a loop.
Don’t forget to keep your working yarn out of the way! It’s easy to forget your working yarn and accidentally tuck it into the fold.
From here, you’ll do the same thing you’ve done with the rest of your loops. Slide your loom hook into the bottom loop.

Then pull it up and over the top of the peg. Let the yarn fall behind the peg, and move onto the next loop. Slide, lift, and fall.
Have you made your way around the entire loom? Excellent! You’ve just finished your tiny hearts beanie brim.
How to Knit the Tiny Hearts
Now that you’ve finished your brim, it’s time to work on the rest of the hat, specifically the tiny hearts. To simplify the process, I made this pixel pattern to follow. On the right hand side, you have the number of rows to knit going upward. On the bottom side you’ll see the numbers 1-36, with each pixel representing a peg on the loom. Note that this pattern does not include the brim.
Don’t worry if your loom does have the exact number of pegs as mine. As you can see, the pattern is a simple one. E-wrap two rows of one color, then on the third row you alternate with your second color after every two pegs.
The great thing about this pattern is that you don’t have to do any specialized stitches to create the tiny hearts. The e-wrap naturally twists a little as you go, making the heart shape as you knit.
But how exactly do you add your second color? In just the same way that you did your first color!
To start, tie a slip knot on your starting peg with your new color (white in this case).
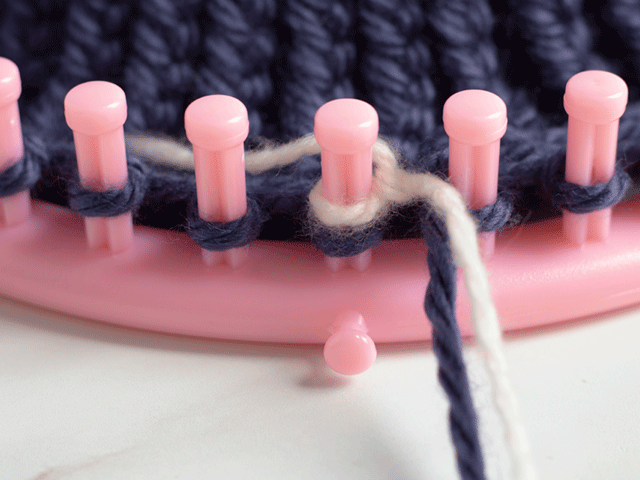
Then e-wrap the next two pegs with your starting color (blue). Then e-wrap the next peg with your second color (white). You’ll repeat the pattern of one peg second color and two pegs first color all the way around your loom.
Once you’ve made it around your loom, you grab your loom knitting hook and pull the bottom loop up over the top of the peg, letting the yarn fall behind the peg. Just like before – slide, lift, fall.
After you have a row of your alternating colors, you go back to knitting two plain rows of your first color (blue). And repeat. One row alternating, two rows plain. If you ever get lost, just take a quick peek back at the pixel pattern shown above.
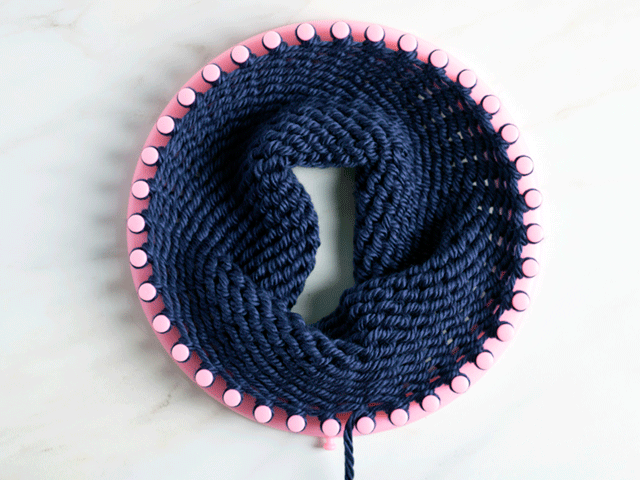
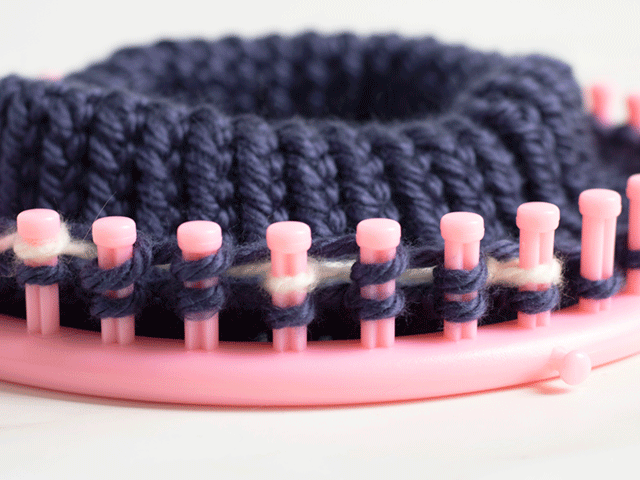
Eventually your hat will start to take shape and look more like a hat. I pulled the inside of the hat up so you can get a better visual of the project as it grows.
Keep in mind that you don’t have to pull the hat up so it looks like this. You’re looking at it inside out right now. You can naturally let the hat fall through the bottom as you work.
Feel free to adjust the length of your beanie. I found 20 rows to be a good size for my head – just enough to be roomy with a little bit extra on top. You can go longer if you want your beanie to slouch more. Or you can go with fewer rows if you have a smaller head.
Casting Off the Loom
Have you finished knitting the pixel pattern? If you have enough rows on your hat, you may be ready to cast off the loom and finish your tiny hearts beanie.
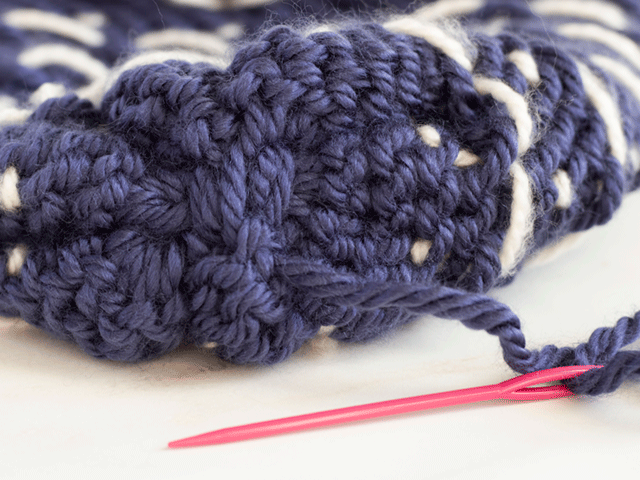
Take your working yarn and wrap it around your loom one and half times. The extra length ensures you have enough yarn to stitch the end of your hat. Cut the yarn and thread the end through the yarn needle.
Find your marking peg and slide the yarn needle through the bottom of the loop. Pull the needle through until the loop slides off the peg. Repeat with the next peg and the next loop until you’ve worked your way around the loom. Keep in mind that you should always come in from the bottom.
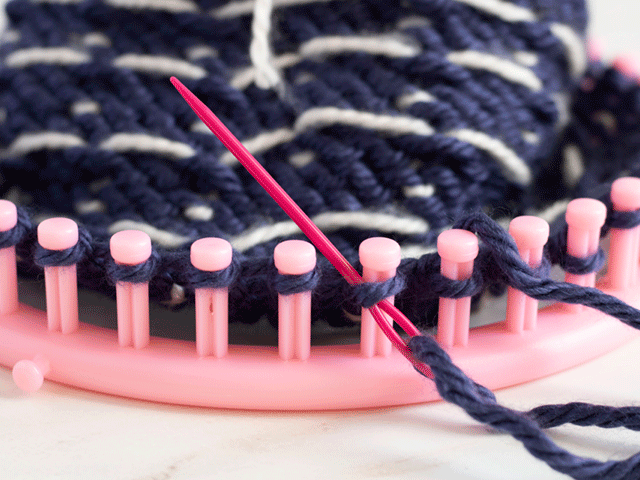
And a small note here on the image – I wasn’t quite paying attention when I took the photo. In the picture, you can see that I’m pulling the needle through a random peg to the right of my marking peg. I corrected my mistake and moved to the marking peg after taking the picture.

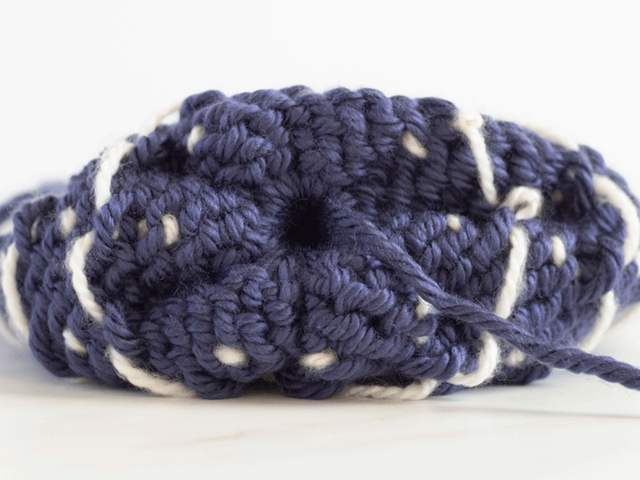
Once you’ve made your way around the loom, your entire hat will naturally pull itself off the pegs. It will look something like the inside out picture below. At this stage, you can knot and trim your secondary color (white) to ensure it doesn’t come loose.
Finishing Up
Pull on your primary yarn (blue) to cinch your hat together and give it a nice bell shape. You want to pull just hard enough that the hole closes most of the way. Please don’t force the hole to close completely – the natural thickness of the yarn will keep it open. Pulling too hard could snap your yarn and ruin your hat.
Instead of pulling it completely closed, you’re going to use the rest of your working yarn to stitch the top of your hat. I find that a generic x-shaped stitch covers the hole nicely while still looking fairly clean and neat. However, if you’re not great at stitching over the hole, don’t panic. You can always cover the top with a pompom.
When you’ve covered the hole, tie a knot and trim the end. If you still have a small tail of yarn, you can weave that into the rest of your hat to hide it.
Now all you have to do is turn your hat right side out, and you’re done with your tiny hearts beanie! Go ahead and wear it or give to a friend. You can be done right now if you wish. Or, if you want to add a little extra flair, feel free to learn how to make and add a pompom below.
Learn to Make a Pompom
Like the icing on a cake, pompoms complete the aesthetic of a lot of cute beanies. A fluffy yarn pompom can turn an otherwise boring beanie into a charming one, while a faux fur beanie can lend an element of class to the overall look
I thought my tiny hearts beanie was too cute to go without a pompom, so I made a fun fluffy one out of the leftover yarn.
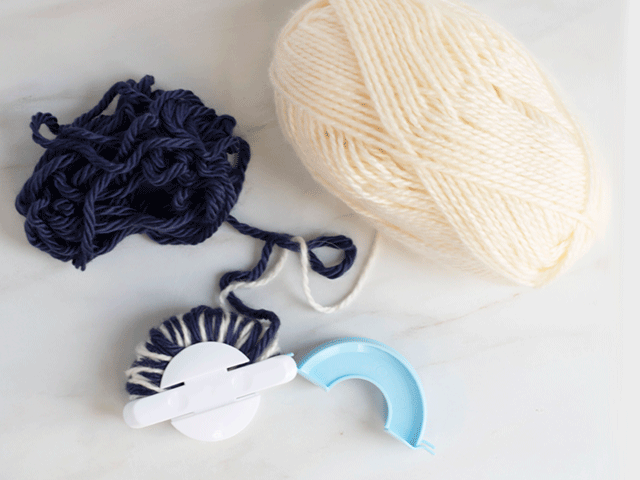
To make this pompom, you’ll need a pompom maker like the one shown below. Just grab both the primary (blue) yarn and the secondary yarn (white), and wrap them both around one arm of the pompom. Try to wrap the arm until it’s completely full so your final pompom turns out especially fluffy.
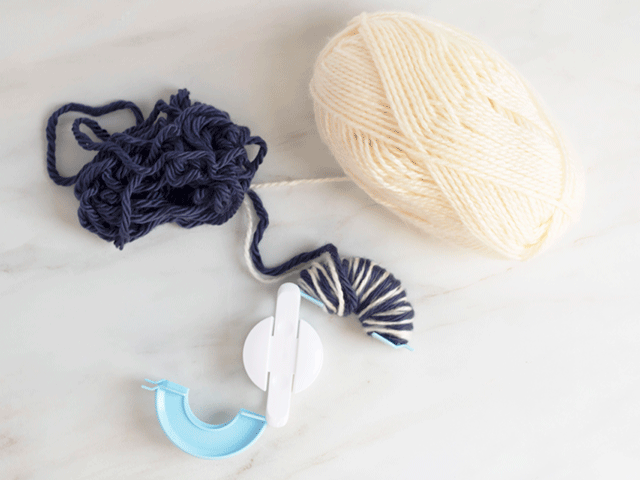
When you’ve wrapped one side, cut the string. Close the arm, and wrap the opposite arm in just the same way. Wrap until it’s completely full.
Cut the yarn and close the arm. Then, with a sharp razor blade or quality craft scissors, cut down the middle of the pompom maker. You want to go across both sides so you can see the middle of each arm.
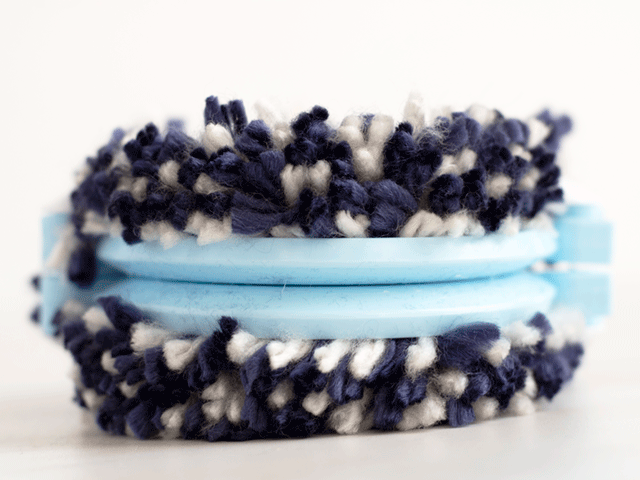
Cut a piece of extra yarn so it’s several inches long. The yarn needs to be long enough to wrap around the pompom maker and give you a little extra left over for stringing onto your hat.
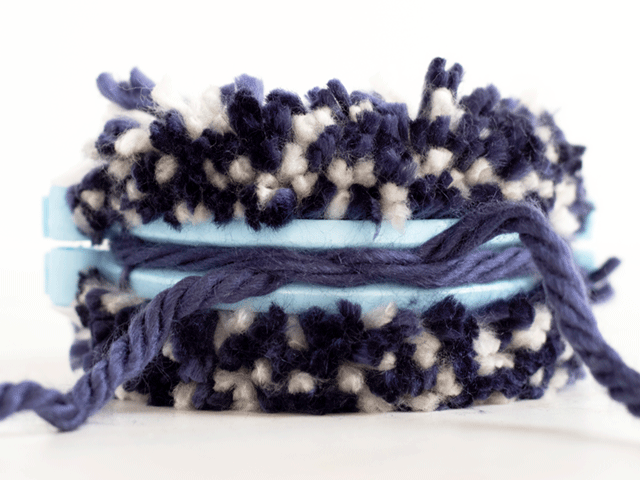
Wrap the yarn around the pompom maker. Cross the ends so it forms a half knot and then pull the yarn tight. You want it as tight as you possibly can, as this makes a stable core for your pompom and lets the rest of the yarn pieces fluff out.
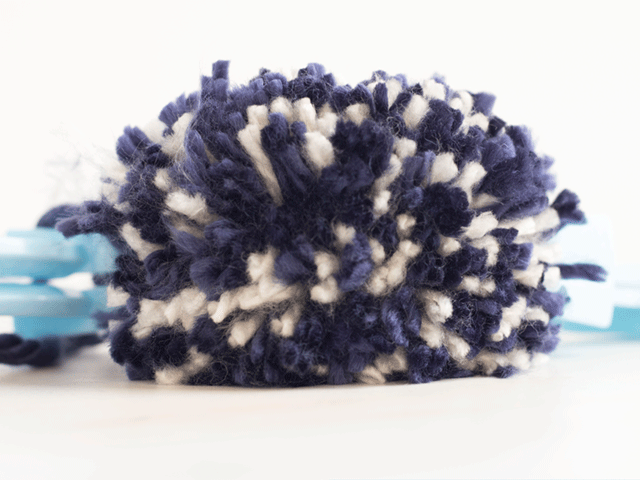
Open the arms of the pompom maker, and then pull apart the adjoining pieces apart. Your newly made pompom will fall right out.
Next, use your fingers to fluff up the pompom and pull away any loose pieces. Use your scissors to trim your pompom into a more uniform shape. Cutting the pompom closer to the core makes the pompom look a bit thicker and neater, but the loose, fluffy pom looks cute too.
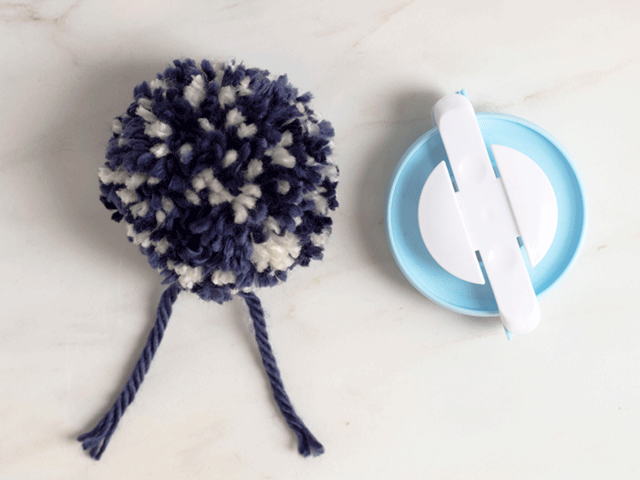
When you’re pompom looks more or less the shape you want, you an attach it to your tiny hearts beanie via the two yarn tails. Pull the yarn tails through the top of the hat, and then tie it tightly from the inside. Trim the excess yarn as needed, flip your hat right side out and you’re all done!
Need Some Extra Help?
I’m still new to loom knitting, so right now I’m sticking to simple projects that I can explain to others. However, I know that what makes sense to me doesn’t always translate well to others. If my tutorial doesn’t make sense, please feel free to reach out to me with any questions you may have about my pattern. I will do my best to answer and help you out however I can.
I hope you love your tiny hearts beanie!